The health of your car battery is related to your driving safety on the road, so it is very necessary to use a multimeter to check whether our car battery is healthy regularly.
About Car Batteries

When we are not sure whether our car battery is in a healthy condition, we need to use a multimeter to test the car battery.Normal voltage range: A healthy 12V lead-acid car battery should have a voltage between 12.6V and 12.8V when fully charged.Voltage when starting: When the engine is running, the battery voltage should be between 13.7V and 14.7V, because the generator is charging the battery at this time.Low voltage warning: Below 12.4V usually means that the battery is weak or aging, and below 12.0V may need to be replaced.
Battery voltage standards for different types of cars
- Traditional fuel vehicles: Most use 12V lead-acid batteries.
- Hybrid vehicles: In addition to the 12V battery, they may also be equipped with a high-voltage battery (200V-300V).
- Electric vehicles (EV): The main power battery is a high-voltage battery (300V-800V), but there is also a 12V auxiliary battery for starting and low-voltage systems.
Frequency of battery inspection for household vehicles
- Regular inspection: It is recommended to check the battery voltage at least every 3-6 months, especially in winter or after a long period of non-use.
- Critical moments: An additional inspection should be performed before a long journey, before cold weather or when starting difficulties occur.
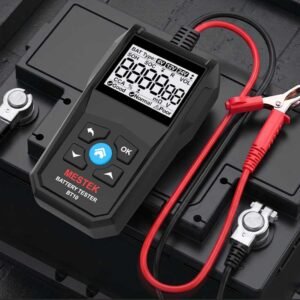
How do I test a car battery with a multimeter?

Testing your car battery with a multimeter is an easy way to check its health and ensure reliable performance. It is a sensible practice to turn off the ignition switch before testing it, as this is a good idea for your own safety.
- Gather Your Tools
Digital multimeter (set to DC voltage)
Safety gloves and glasses (recommended)
- Prepare the Vehicle
Park the car on a flat surface and turn off the ignition.
Open the hood and locate the battery.
- Set Up the Multimeter
Turn the multimeter dial to DC voltage (V), typically indicated by a solid and dotted line above the letter “V”.
Choose a range like 20V to accurately measure standard 12V car batteries.
- Connect the Probes
Attach the red (positive) probe to the battery’s positive terminal (marked with a “+”).
Attach the black (negative) probe to the battery’s negative terminal (marked with a “-“).
- Read the Voltage
If the reading is 12.6V or higher, the battery is fully charged.
12.2V to 12.6V indicates partial charge.
Less than 12.0V means the battery is likely discharged or failing.
- Disconnect and Wrap Up
Safely remove the probes, starting with the black (negative) one.
Close the hood and clean up any tools.
- Additional Tips
Regularly test your battery, especially before long trips or in extreme weather.
Consider a battery maintainer if your car sits idle for long periods.
FAQ
It’s a good idea to check your alternator at least twice a year, or whenever you notice electrical issues like dim lights or slow power windows.
Yes, a failing alternator can overcharge or undercharge the battery, significantly reducing its lifespan or even causing permanent damage.
Voltage fluctuations can indicate a weak alternator, loose connections, or a failing voltage regulator, and should be inspected as soon as possible.
A healthy car battery should read around 12.6 volts or higher when fully charged and the engine is off. If the reading drops below 12.4V, the battery may be partially discharged, and anything under 12.0V usually indicates a weak or failing battery.
No, you don’t need to remove the battery. You can test it directly while it’s still installed in the vehicle. However, ensure that the car is turned off and electrical accessories are disconnected for the most accurate reading.
It’s recommended to test your car battery every 3–6 months or before long trips. Extreme weather (very hot or cold conditions) can affect battery performance, so testing during seasonal changes is also a good practice.
Yes, but results may be less accurate. Alternatives include using a car battery load tester or checking the battery’s built-in indicator (if available). However, a digital multimeter remains the most reliable and precise tool for testing.
A reading of 12.4V may indicate the battery still holds charge, but it might lack the necessary cranking amps to start the car. In such cases, the issue may be with the battery’s internal capacity, corrosion on terminals, or a failing starter system.
conclusion
If you’re looking for a reliable, versatile multimeter for both low-voltage car battery checks and high-voltage EV systems, the Mestek DM96A is a great choice. It supports a wide measurement range from 600mV to 1000V for DC and 6V to 750V for AC, making it perfect for everything from standard 12V car batteries to modern EV power systems. With 6000 counts for precise readings, automatic range selection, and CAT III 1000V safety rating, it’s built for both professional and DIY use. Visit Mestek Instruments for more details.