A coating thickness gauge, also known as a paint thickness meter or paint thickness tester. It is a precision instrument used to measure the thickness of a coating layer applied to a substrate. This could be paint, powder coating, plating, galvanizing, anodizing or any other protective or decorative layer.
These devices are essential for quality control across multiple industries to ensure coatings meet required specifications for performance, durability and aesthetics. Too thin and the coating will fail prematurely; too thick and it will crack, peel or waste material.
Operating principles
Coating thickness gauges operate on three main principles, each suited for specific material combinations:
Magnetic Induction Method
This method measures non-magnetic coatings on magnetic substrates such as steel or iron. The instrument uses an exciter coil to create a low-frequency magnetic field, usually in the hertz (Hz) range. When the probe approaches a ferromagnetic material, the magnetic field becomes amplified. A measuring coil detects this amplification as voltage, with the voltage difference corresponding to the distance between the probe and the substrate – essentially the coating thickness.
Best For: Non-magnetic coatings (paint, enamel, powder) on ferrous metals.
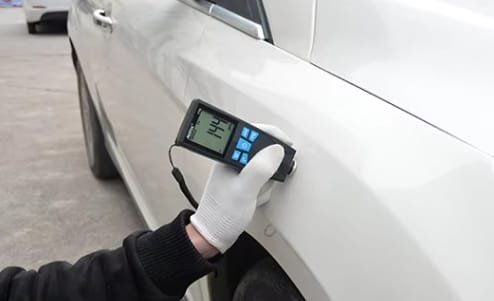
Example: Car body panels made of steel to ensure even paint application.
Standards: Conforms to ISO 2178 for ferrous substrate testing.
Eddy Current
This principle measures non-conductive coatings on non-ferrous metals like aluminum, copper or brass. The gauge sends a high-frequency electric current (over 1 MHz) to create an electromagnetic field. When it’s close to a metal surface, this field produces tiny electric loops called eddy currents, which make their own opposing magnetic field. The stronger this opposing field, the thinner the coating. Eddy current gauges can measure thicknesses between 0.5 and 25 μm with accuracy of 10% for lower values and 4% for higher values.
Best For: Non-conductive coatings (paint, anodizing) on non-ferrous metals like aluminum or copper.
Example: Anodized aluminum parts in aerospace manufacturing.
Standards: Meets ISO 2360 requirements for testing coatings on non-ferrous surfaces.
Ultrasonic
This method sends ultrasonic pulses through coatings on virtually any substrate, including plastics, wood and composites. The gage calculates thickness based on the time it takes for sound waves to travel through the coating and reflect back from the substrate. Modern ultrasonic gauges can even measure individual layers in multi-layer coating systems.
Best For: Coatings on non-metal substrates (plastic, fiberglass, composites, wood).
Example: Epoxy coatings on fiberglass boats or clear coats on wooden floors.
Standards: Conforms to ASTM D6132 for ultrasonic thickness measurement.
Applicable industries
Coating thickness gauges are used in:
Automotive Painting – Verifying factory and aftermarket paint thickness for quality control and accident detection.
Industrial Corrosion Protection – Ensuring protective coatings on pipelines, bridges and machinery meet specifications.
Metal Processing & Fabrication – Controlling plating and anodizing layer thickness.
Marine & Aerospace – Inspecting anti-corrosion coatings in harsh environments.
How does a Paint Thickness Tester work?
Paint thickness testers work through precise physical principles to measure coating layers without damaging them. Each technology is designed for specific material combinations to ensure accurate measurements across various applications.
1) Magnetic Induction · For ferromagnetic metals
Magnetic induction gauges measure non-magnetic coatings on ferrous metals like steel and iron. They work by sending a low-frequency electric current (in the hertz range) through a coil wrapped around an iron core. As the probe approaches a magnetic substrate, the iron amplifies the magnetic field.
A measuring coil senses this amplification as a voltage signal, with the voltage difference directly indicating the coating’s thickness. The relationship is inverse—thicker coatings create larger magnetic resistance and smaller magnetic fluidity. This method precisely measures paint, enamel, chrome, or zinc coatings applied to steel.
Best for: Paint on steel, powder coating on steel, galvanized steel coatings.
2) Eddy Current · For measuring non-ferrous metals, such as aluminum
Eddy current gauges are used to measure non-conductive coatings on non-ferrous metals such as aluminum and copper. The probe contains a coil generating a high-frequency alternating current (above 1 MHz) that creates an electromagnetic field. When placed near a conductive surface, this field induces eddy currents.
The magnitude of these currents depends on the distance between the probe and substrate—specifically, the closer the probe is to the conductive surface, the larger the eddy current. Furthermore, these currents generate their own opposing magnetic field, which the instrument detects to determine coating thickness.
Best for: Paint on aluminum, anodized coatings, epoxy on copper.
3) Ultrasonic · For non-metal or composite materials
Ultrasonic gauges measure coatings on virtually any substrate, including plastics, wood, composites and concrete. These instruments send ultrasonic pulses through the coating via a coupling gel. The pulse bounces back from any surface with a different density, mainly where the coating meets the base material.
The gauge works by timing how long it takes for a signal to travel through the coating and back. It calculates the thickness by dividing that time in half and multiplying it by the coating’s sound speed. Advanced ultrasonic gauges can even measure up to six individual layer thicknesses simultaneously.
Best for: Plastics, wood, fiberglass and multilayer coatings.
Types of Coating Thickness Gauge
Coating thickness gauges are essential for measuring the thickness of paint, plating, or other protective coatings on various surfaces. The choice of gauge depends on the substrate material, required accuracy, and the measurement environment. Below is an overview of the main types, along with their benefits and common usage scenarios.
| Type | Benefits | Application Scenarios | Best For |
| Magnetic Induction (Fe) | – Measures non-magnetic coatings on ferrous metals- Non-destructive testing- High precision | – Paint on steel- Powder coating on iron- Chrome/copper/zinc plating on steel | Steel fabrication, automotive paint inspection, shipbuilding |
| Eddy Current (NFe) | – Measures insulating coatings on non-ferrous metals- Fast measurements- Portable | – Paint on aluminum- Coatings on brass- Anodizing on stainless steel | Aerospace, aluminum manufacturing, decorative metal finishing |
| Dual Purpose (Fe/NFe) | – Automatic substrate detection- Versatile applications- Reduced need for multiple tools | – Automotive body shops- Manufacturing facilities- Quality control labs | Mixed-metal environments, car detailers, OEM quality checks |
| Ultrasonic | – Works on non-metallic substrates- Measures multiple layers- Non-destructive | – Coatings on plastic- Wood finishes- Composite materials | Aerospace composites, furniture finishing, marine coatings |
| Mechanical | – No batteries required- Suitable for hazardous areas- Works underwater or in high temperatures | – Offshore applications- Explosive environments- High-temperature surfaces | Field inspections in extreme environments, oil & gas |
| Digital | – Data logging capabilities- Statistical analysis- High accuracy (±3% + 2μm) | – Industrial quality control- Automotive refinishing- Production monitoring | Manufacturing QA, automotive refinishing, lab testing |
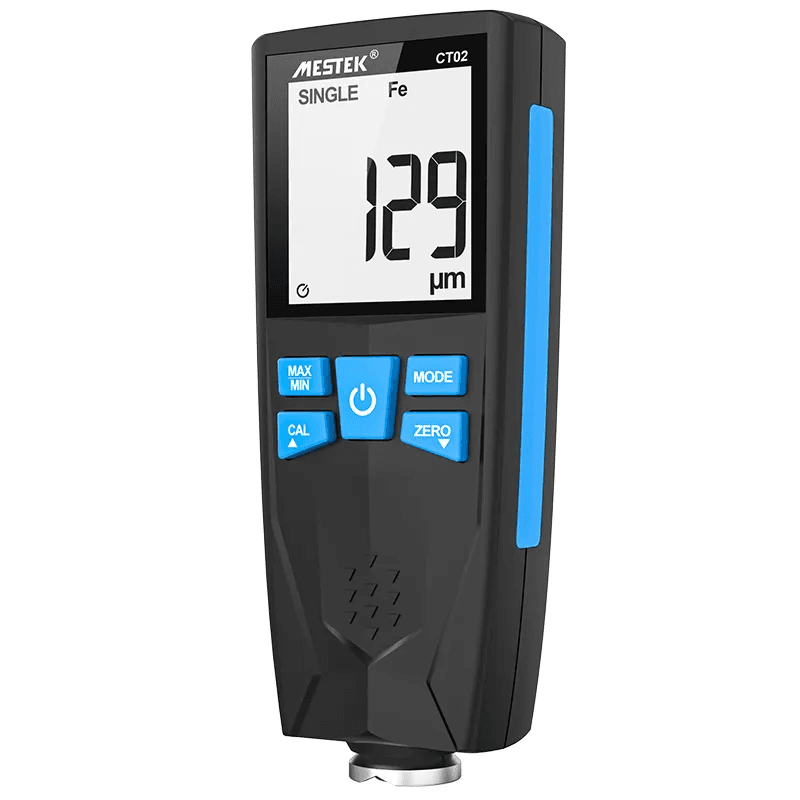
If you need a versatile, high-accuracy coating thickness gauge for both ferrous and non-ferrous materials, consider the MESTEK CT02C. It features magnetic induction for iron bases and eddy current for aluminum bases, a built-in rechargeable battery, 0.1 μm resolution and single or continuous measurement modes that make it perfect for automotive paint inspections.
How to Measure Paint Thickness Correctly
Accurate measurements with a coating thickness gauge depend mainly on proper technique and preparation. Unlike diagnostic tools, these precision instruments require a systematic approach to deliver reliable results.
Step-by-Step Paint Thickness Measurement Guide
- Calibrate your instrument at the beginning of each work shift using certified standards or shims
- Verify accuracy by measuring on known thickness standards that are traceable to national metrology institutions
- Zero the gage on uncoated metal of the same type or adjust using shims
- Hold the probe straight up, perpendicular to the surface.
- Apply consistent pressure and hold steady until the measurement appears
- Lift the probe at least 2 inches (5cm) between readings rather than dragging it across the surface.
- Take multiple readings at different points to account for variations
Common Mistakes to Avoid
Even skilled operators encounter measurement errors due to:
- Dirty surfaces containing paint residue or contaminants
- Probe wear is causing lower than expected readings
- Foreign material on the probe tip leads to falsely high readings
- Improper probe angle rather than a perfectly perpendicular position
- Edge effects when measuring too close to corners or edges
- Surface roughness affects baseline readings
- Substrate properties including magnetism, conductivity and temperature
- Curved surfaces create inconsistent probe contact
FAQ
1. How accurate is a paint thickness meter?
Digital gauges offer precision to the micron level with typical tolerances of ±3% for magnetic gauges and ±3% for ultrasonic models. Higher-end instruments provide greater accuracy, although even mid-range devices offer sufficient precision for most applications.
2. What is the ideal paint thickness for automotive coatings?
There is no absolute target. Factory automotive finishes typically range between 4-7 mils (100-180 microns). Consistency across panels matters more than specific thickness values.
3. What is the difference between magnetic and eddy current gauges?
Magnetic induction measures non-magnetic coatings on steel or iron, while eddy current gauges measure non-conductive coatings on non-ferrous metals. Dual-purpose instruments combine both technologies.
4. Can a coating thickness gauge detect rust under paint?
No, conventional gauges can’t. For rust detection under paint, you need specialized microwave non-destructive testing.
5. What affects the accuracy of a paint thickness tester?
Surface roughness, curvature, edge effects, substrate composition, probe pressure, magnetic fields, temperature changes, and contaminants on the probe or surface.
6. Do I need to calibrate my coating thickness meter?
Yes. Calibrate before each use, when changing substrates, after temperature changes and according to manufacturer’s instructions.
Conclusion
Choosing the right coating thickness gauge is an investment in quality control. It saves you money, ensures client specifications and extends coated material life. MESTEK offers professional-grade coating thickness testers for automotive, industrial and electroplating industries. Whether you’re a car detailer, quality control inspector or industrial painter, the right tool will take your work to the next level.
