An air conditioner that runs for hours but barely cools the room can be frustrating. A refrigerant leak detector can help identify one possible cause: a refrigerant leak, especially if the system used to cool normally and its performance has gradually declined. However, a dirty filter, blocked airflow, or another mechanical problem can produce similar symptoms.
The challenge is that refrigerant leaks are not always visible. A small leak around a pipe connection may leave little evidence, while a leak inside a coil can be difficult to reach. Knowing what to look for and which detection methods to use can help narrow down the problem before unnecessary repairs are made.
Common Signs of a Refrigerant Leak
A few changes in an air conditioner’s performance may indicate a refrigerant leak. None of them confirms a leak on its own, but they can help identify when further inspection is needed.
The air conditioner is not cooling as well as before. If the system runs normally but the room takes much longer to reach the set temperature, refrigerant loss is one possible explanation. Low airflow, a dirty air filter, and other faults can cause similar problems.
Ice forms on the evaporator coil or refrigerant lines. Ice may develop when the system operates under abnormal conditions. A refrigerant leak can contribute to this, but restricted airflow can also cause a coil to freeze.
The room feels more humid than usual. An air conditioner removes moisture as it cools the air. If cooling performance drops, the system may also become less effective at controlling indoor humidity.
Oily residue appears around connections. Refrigerant circulates with compressor oil in many air conditioning systems. An oily mark near a pipe joint, valve, or coil connection may indicate a leak and is worth checking.
A hissing sound comes from the equipment. Escaping gas can sometimes produce a hissing noise, although other components can make similar sounds.
If several of these signs appear together, arrange an inspection. Avoid assuming that the system simply needs more refrigerant.
How to Check for Refrigerant Leaks
The right detection method depends on where the suspected leak is located, how accessible the area is, and which refrigerant the system uses.
1. Inspect Accessible Pipes and Connections
Start with a visual inspection of accessible refrigerant lines, fittings, and the areas around the indoor and outdoor units. Look for oily residue, corrosion, damaged tubing, or signs of physical impact.
Pay particular attention to connection points and service valves, where seals and fittings can deteriorate over time. Do not remove covers or reach into equipment while it is operating. Electrical components and moving parts can present hazards.
A visual inspection is useful for identifying areas that need closer attention, but it cannot rule out a leak. Many leaks leave no obvious mark.
2. Use a Refrigerant Leak Detector
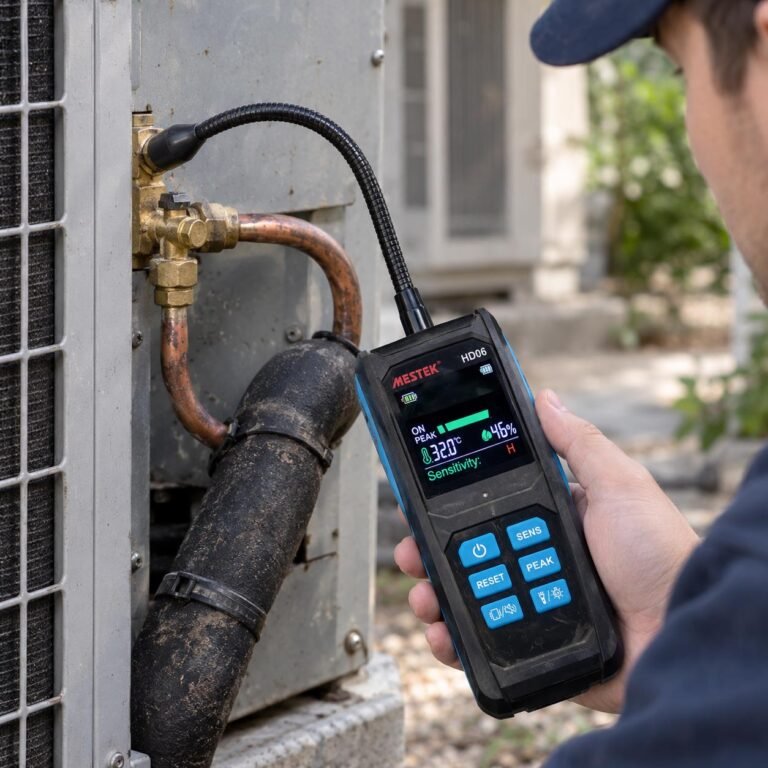
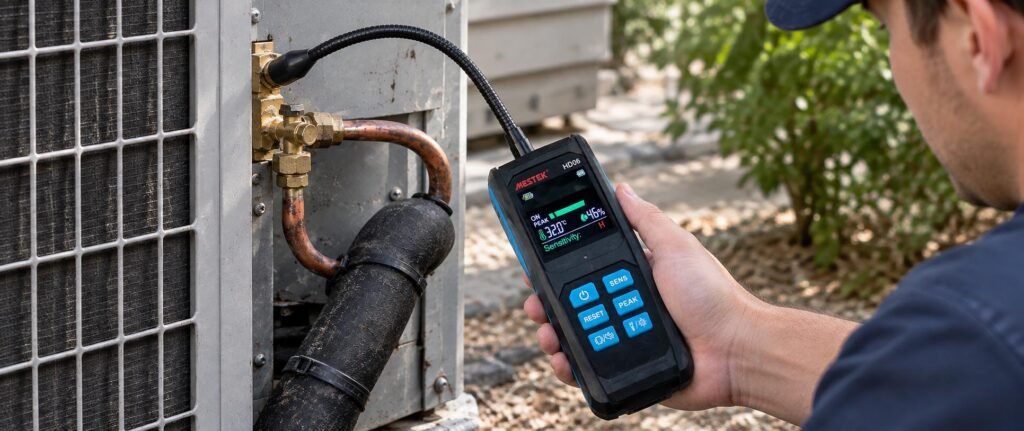
An electronic refrigerant leak detector senses refrigerant gas near a suspected leak. Unlike a visual inspection, it can help locate small leaks that are difficult to see.
Before using one, check that the detector supports the refrigerant specified on the air conditioner’s nameplate or service documentation. Not every detector works with every refrigerant.
Electronic detectors are particularly useful around accessible pipe joints, valves, and other potential leak points. They can also help technicians investigate areas where visual evidence is limited.
3. Apply an Approved Leak Detection Solution
A compatible leak detection solution can help confirm a suspected leak at an accessible joint. When applied according to its instructions, escaping gas may produce bubbles at the leak point.
This method is generally more useful for pinpointing accessible leaks than for inspecting an entire system. It may not reveal very small leaks, and it is not suitable for every location.
Do not spray liquids onto electrical components or use an unapproved household mixture where residue could affect the equipment. Follow the product manufacturer’s guidance.
4. Leave Advanced Testing to an HVAC Technician
Some leaks occur inside evaporator coils, condensers, or other components that are difficult to access. A technician may need to use additional methods, such as a pressure test with an approved test gas or a compatible fluorescent dye system.
These procedures require suitable equipment and knowledge of the system. Refrigerant recovery, pressure testing, and repairs should be performed by qualified personnel in accordance with applicable regulations.
How to Use a Refrigerant Leak Detector
For accessible suspected leak points, an electronic detector can make the inspection more systematic. The exact procedure varies by model, so always follow the manufacturer’s instructions.
Check the detector and refrigerant type.
Confirm that the instrument is suitable for the refrigerant in the system. Check the sensor or probe, battery level, and any other preparation requirements in the manual.
Turn on the detector and allow it to warm up.
Some instruments need a short warm-up period before they are ready to use. Wait until the instrument indicates that it is ready, and complete any calibration or reference checks specified by the manufacturer.
Examine likely leak points.
Start with accessible connections, valves, and refrigerant lines. Keep the probe close to the area being checked without touching the surface unless the manual specifically permits contact.
Move the probe slowly.
Follow the line and inspect suspected areas at a steady pace. Moving too quickly can make a small leak easier to miss. Strong airflow can also disperse refrigerant and affect the result.
Check any alarm indication again.
If the detector signals a possible leak, follow its instructions for clearing the reading and checking the area again. A repeated indication can help narrow down the location, but an alarm should not automatically be treated as final proof of a leak.
Record the suspected location.
Note where the detector responded so a technician can investigate the area. Continue checking other accessible points if the inspection procedure calls for it; finding one leak does not guarantee that no others exist.
Choosing a Detector for Air Conditioning Maintenance
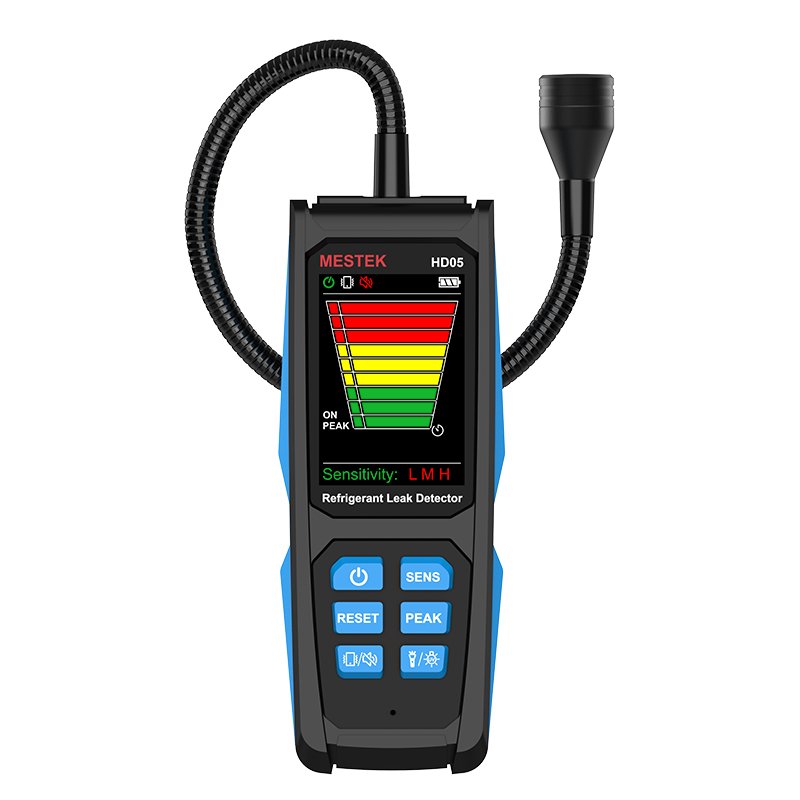
A detector with a flexible probe can make it easier to reach around pipe connections and other confined spaces. A clear display and audible or vibration alarms can also help users notice changes during an inspection.
For example, the MESTEK HD05 Refrigerant Leak Detector has a 270 mm flexible probe, a 0–1000 ppm measurement range, and 1 ppm resolution. It supports multiple refrigerants, including R-22, R-32, R-134a, R-410A, R-404A, and HFO-1234yf. Its color screen, buzzer, vibration alert, and analog bar graph provide several ways to indicate a detected response.
The HD05 has a 30-second warm-up countdown and a stated response time of less than 10 seconds. Before use, confirm that the specific refrigerant being tested is included in the instrument’s specifications.
What Should You Do If a Refrigerant Leak Is Found?
Once a leak is suspected or detected, the next step is to identify its source and arrange the appropriate repair.
Do not simply add more refrigerant and continue operating the system without investigating the cause. If refrigerant is escaping, topping up the charge does not fix the leak.
For a suspected leak, contact a qualified HVAC technician. The technician can confirm the location, assess whether the damaged part can be repaired or needs replacement, and restore the system to the manufacturer’s specifications.
If the air conditioner has a confirmed leak, follow the technician’s advice on whether to stop operating it until repairs are complete. Avoid opening refrigerant lines or attempting to release, recover, or recharge refrigerant yourself.
How to Reduce the Risk of Future Refrigerant Leaks
Routine maintenance cannot prevent every leak, but it can help identify developing problems before they cause a major loss of cooling performance.
Keep air filters clean and maintain adequate airflow through the system. Arrange periodic professional inspections of accessible refrigerant lines, connections, coils, and service valves. Damaged or corroded components should be assessed rather than left unattended.
If an air conditioner repeatedly loses cooling performance or requires refrigerant to be added, ask the technician to investigate the underlying cause. Refrigerant should not normally need repeated topping up in a properly sealed system.
Conclusion
Detecting refrigerant leaks starts with recognizing changes in cooling performance and inspecting accessible components for possible signs of damage. An electronic refrigerant leak detector can help locate suspected leaks, while approved leak detection solutions and professional testing may be needed to confirm the source.
The most important point is to distinguish a warning sign from a confirmed leak. Use a detector that is compatible with the system’s refrigerant, follow its operating instructions, and leave refrigerant handling and repairs to qualified HVAC professionals.