Whether you are a professional technician, a DIY enthusiast, or a business owner, knowing how to use an infrared thermometer correctly can save you time and avoid costly mistakes. Choosing the best infrared thermometer for your home project depends on your home needs and other factors you can think of.
Understanding How Infrared Thermometers Work
Infrared thermometers can detect infrared radiation emitted by objects and convert it into temperature readings. They are suitable for measuring moving parts and places that are difficult for us to reach. Traditional thermometers can’t do this, so safety is a decision that infrared thermometers are the first choice.
Infrared thermometers are divided into industrial and home use. Industrial infrared thermometers usually range from 1200°C to 3000°C, while home use, such as cooking, is more likely to be 400°C to 800°C. When choosing an infrared thermometer, we should consider the actual usage scenario.
Steps to Use an Infrared Thermometer
- Check the Emissivity Setting
Ensure your thermometer’s emissivity is set correctly for the material you’re measuring. Most IR thermometers are preset to 0.95, which works for most organic materials, water, and painted surfaces, but may need adjustment for shiny metals.
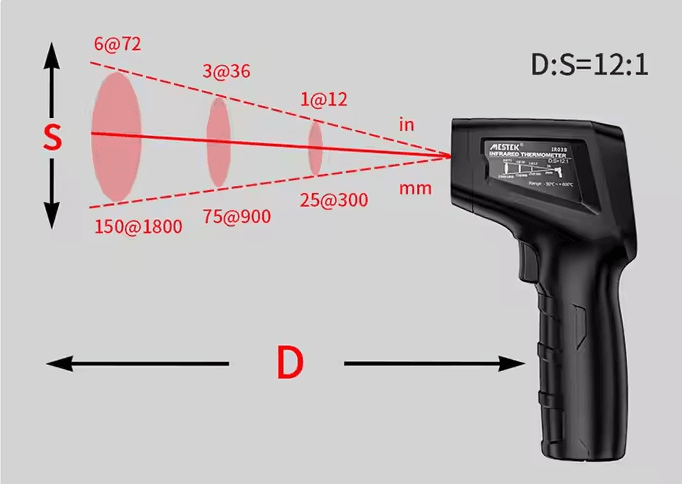
- Select the Correct Distance-to-Spot Ratio (D:S)
This ratio determines the area being measured. For example, a 12:1 ratio means the thermometer measures a 1-inch diameter area from 12 inches away. Be aware of this to avoid inaccurate readings.
- Aim and Measure
Point the thermometer at the target, squeeze the trigger, and read the temperature on the display. Avoid measuring through glass or other transparent materials, as this can distort the readings.
- Avoid Common Mistakes
Don’t measure reflective surfaces without adjusting the emissivity. Avoid using the thermometer in foggy, smoky, or dusty environments for the best results.
Types of Infrared Thermometers
While I’m not sure how to choose an infrared thermometer, it’s worth knowing that there are several different designs of infrared thermometers, each of which is suitable for specific applications:
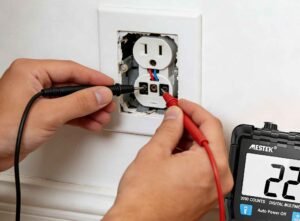
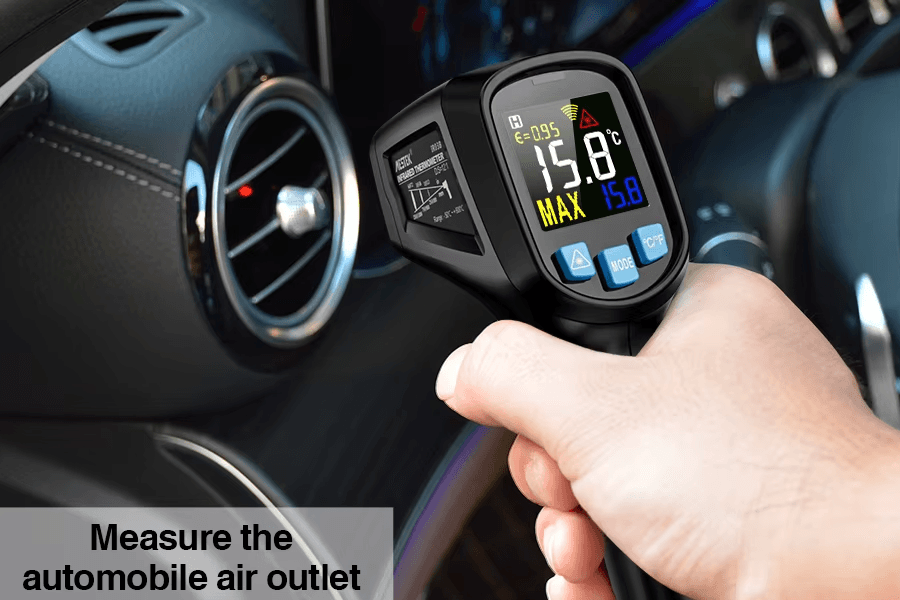
- Handheld Infrared Thermometers
These are the most common type, typically shaped like a pistol for easy aiming. They are perfect for checking engine parts, electrical systems, or HVAC vents.
- Fixed Mount Infrared Sensors
Used in industrial settings for continuous monitoring, often mounted above production lines or inside machinery.
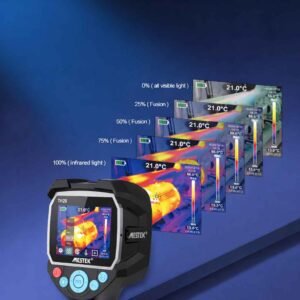
- Thermal Imaging Cameras
Advanced models that provide a full temperature map of an area, commonly used in firefighting, electrical inspections, and building diagnostics.
Note:Each type has its own strengths, so choosing the right one depends on the nature of the job and the level of accuracy required.
Frequently Asked Questions
1. Can I measure human body temperature with an infrared thermometer?
Technically, this will cause a large error in the measured data. Because human body temperature measurement needs to be accurate to several decimal places. Medical infrared thermometers are specially calibrated for body temperature, while industrial-grade infrared thermometers may have lower accuracy.
2. Why do I get different readings when I measure the same object?
This can happen if the emissivity is set incorrectly or if you are too far from the target, affecting the spot size.
3. What is the maximum temperature an infrared thermometer can measure?
This varies by model, but many can measure up to 1000°C (1832°F) or more. Always check your device’s specifications for accurate limits
Wrapping Up
If you are looking for the right infrared thermometer, from infrared thermometers suitable for home use to high temperature infrared thermometers suitable for industrial scenarios, Mestek Instruments will provide you with the right solution.