You are holding a power tool on one hand and a shiny new outlet cover on the other, and you’re staring at that big gray breaker box in the corner. You know you should turn off the power before tampering with anything, but which switch is right?
Most breakers look like they were scribbled up in a rush during the last solar eclipse with faint pencil marks, crossed-out names, or the ever-helpful “Misc.” You attempt a couple of breakers, but the light in the bathroom remains on. You try again, and suddenly , your Wi-Fi is down. It’s not an ideal situation!
This is where a circuit breaker finder comes in handy. This genius little gadget streamlines the process of finding breakers and is, dare we say, kind of fun to use.
Through our guide, you’ll learn what a circuit breaker finder tool is, how to use a circuit breaker finder, how to pick the best one for you, and how to avoid making expensive mistakes.
What’s a Circuit Breaker Finder, and Why Do You Need One?
A circuit breaker finder gives you an easy and efficient way to identify and locate the right breaker for any given electrical outlet. It’s a matchmaker for your breaker box, linking circuits to their corresponding switches with a simple signal.
Here are some points on why this tool is one you’ll be glad to have in your toolbox:
- It eliminates the guesswork.
- It will keep you safe when working with electricity.
- It saves a ton of time.
- It enables you to mark your breakers clearly for future reference.
If you’re replacing a ceiling fan, installing a new outlet, or doing any maintenance on a circuit, you’ve got to cut the power first.
But unless your panel is accurately labeled (spoiler: it almost certainly isn’t), that step alone can chew up 20–30 minutes. With a breaker finder tool, it now takes less than a minute to complete that job.
What Is Included with a Circuit Breaker Locator?
The battery case serves as packaging, a working case, or both.
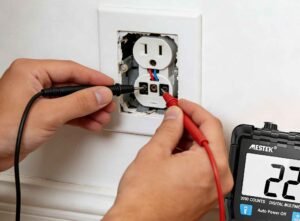
- Transmitter-Attaches to the outlet or wire directly. It emits a signal via an electrical circuit.
- Receiver- Also used at the breaker panel to find that signal and determine the correct breaker to turn off.
Some of the better circuit breaker finder models also feature the following:
- Light socket adapters
- Alligator clips for naked wire
- Digital displays
- Tote bags for convenient storage
- The process is deceptively simple and effective once you know how the pieces fit together.
The process is deceptively simple and effective once you know how the pieces fit together.
How to Use a Circuit Breaker Finder: A Step-by-Step Guide
Now, how to use a circuit breaker finder?
Step 1: Connect the Transmitter
Begin by plugging the transmitter into the outlet you wish to trace. This is your signal source. For those of you wiring your doorbell rather than an existing chime, it’s as simple as plugging in the transmitter with the appropriate adapter (usually included with nicer models).
Do not power OFF — this is crucial. The transmitter requires a live circuit to transmit a detectable signal.
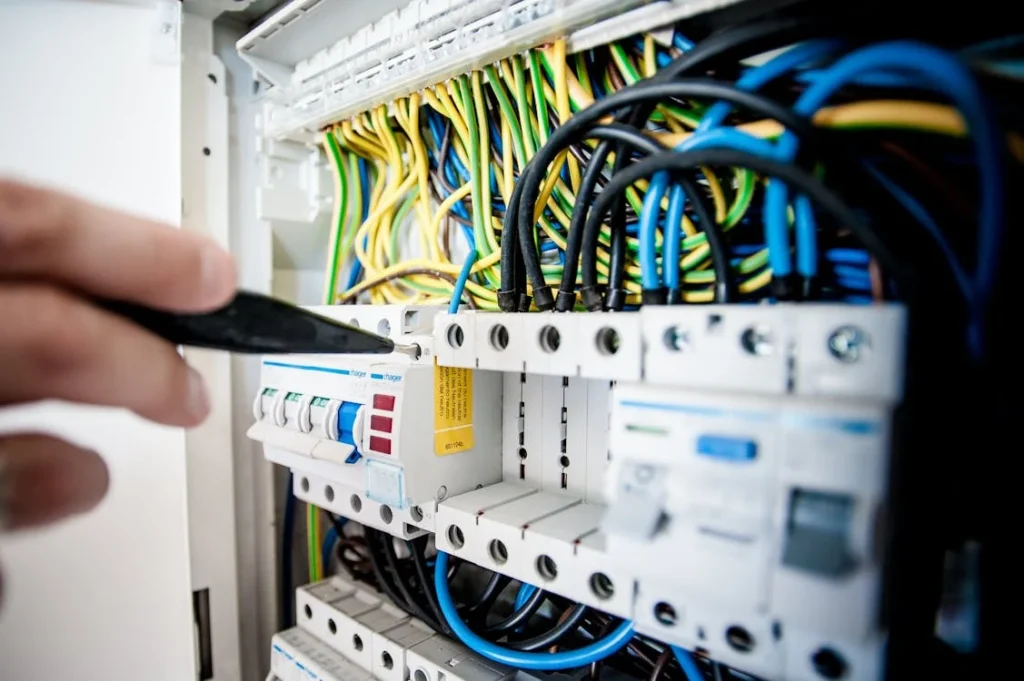
Step 2: Power on the Receiver
Bring the receiver to your breaker box. Turn it on, and prepare to scan each of those breaker switches one at a time, deliberately and slowly. This part may be a bit reminiscent of a search for buried treasure — and really, it is just as satisfying when you strike gold.
Step 3: Scan Each Breaker
Move the receiver slowly along each breaker in the panel. When you reach the one connected to the transmitter, the receiver will signal you with a beep, flash, vibration, or a combination of these, depending on the model.
Tip: Read from the top and work your way down, a row at a time. Avoid rushing. Allow the receiver to process each breaker completely.
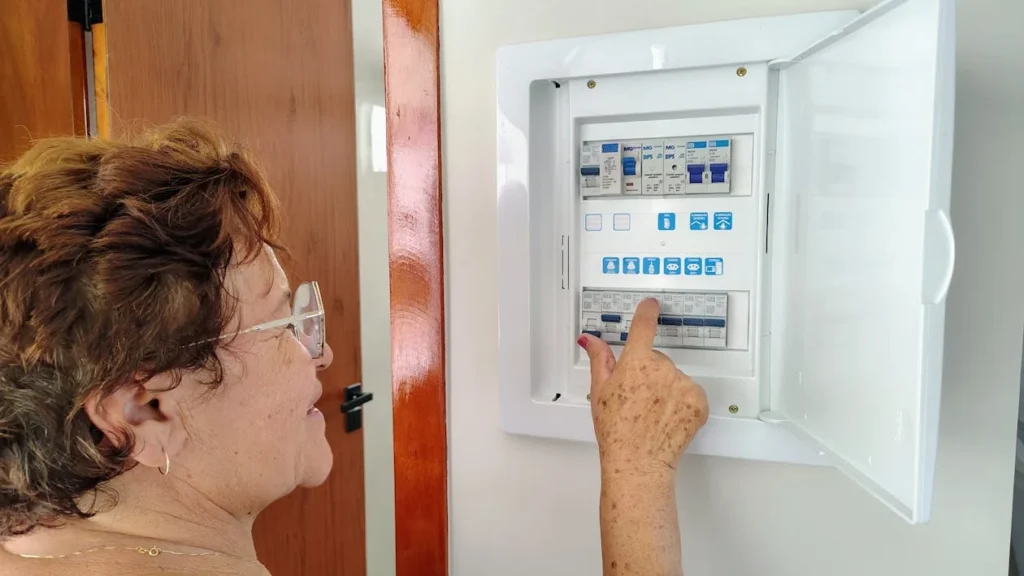
Step 4: Confirm the Match
When you find the “hot” breaker, switch it off. Return to your switch or fixture and ensure the power is off. If the transmitter no longer lights up or beeps, you’ve got the correct one. Safe to go ahead with your project!
Step 5: Label the Breaker
Oh, but we won’t stop there—next, take a label maker or a Sharpie and label the breaker with its corresponding location, like “Kitchen Outlet” or “Living Room Plug.” This helps you easily identify which breaker controls which area in the future.
Why Every Home DIY-er Should Have a Circuit Breaker Finder
Here’s what makes a circuit breaker finder tool worth every dollar:
- Great for solo work: There’s no reason to hassle your partner or roommate to holler from the other room.
- Adds safety: Never again risk an unexpected shock or work on live wires.
- Saves hours over time: No, really, that thing pays for itself within minutes.
- Increases your knowledge: The more often you use it, the better you understand the electrics and wiring in your home.
How to Pick the Top Circuit Breaker Finder
All breaker finders are not the same. Here’s what to consider and how to pick the best circuit breaker finder for you.

- Accuracy
Your prediction widget should reliably locate the right breaker with no false positives. Search for models with a positive review and a strong signal indicator.
- Ease of Use
Never use any too complicated instruments. The good ones work from the get-go with clear instructions.
- Versatility
Light socket adapters, GFCI outlets, and nearly bare wires make your tool more versatile.
- Durability
If you’re going to use it a lot, you want something durable.
Popular brands are Klein Tools, Extech, and Mestek Instruments, all of which have models suited to beginners and pros.
About The Common Mistakes to Avoid
Even when you have a great tool, there are mistakes but how to avoid those? here’s the solution:
- Scanning too fast: Go slow. Be methodical.
- Disregarding feedback: If the receiver is flapping arms all around like it just doesn’t care, it can be the wiring.
- Skipping the final test: Before starting any electrical work, make sure the power is off.
Ending Remarks
A circuit breaker finder is more than just a gadget; it’s a lifesaver. It turns messy breaker boxes into tidy grids.
It speeds up projects, makes them safer, and less stressful. And it can make you feel like the most prepared person in the room.
If you are ready to do clever, stress-free DIY electrical work, now is the time to have a circuit breaker finder that will withstand the test of time.
Check out Mestek Instruments for great deals on professional-grade breaker finder tools and other must-have electrical gizmos built for accuracy and effectiveness.
The gadget(s) available here will allow you to figure out which circuit breaker or fuse will kill the outlet or fixture you are interested in, without turning everything off.
Not convinced? Here, check out some of the Key Features of our Breaker Finders:
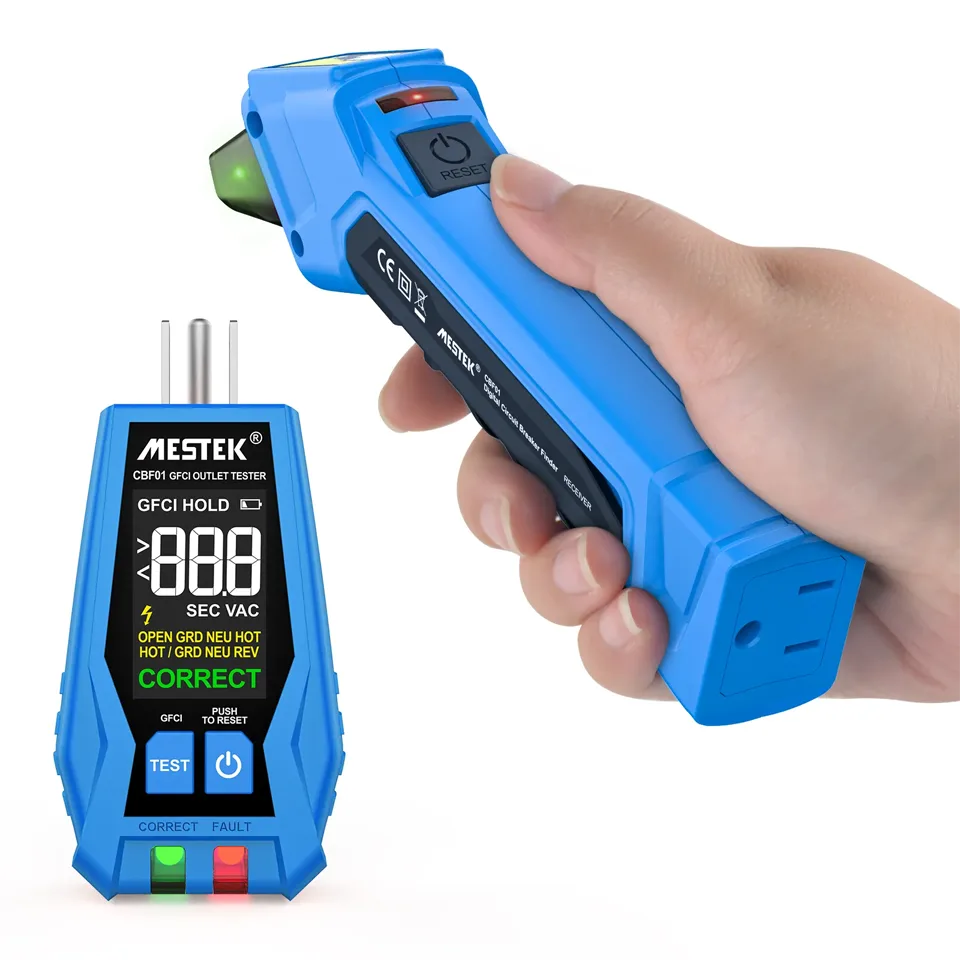
- Built-In Display Screen (Primary Selling Point): The CBF01 is uncommon due to its built-in digital display screen, which is a key standout feature that provides visual feedback and signal strength to ensure breaker location in less time than working with other models. Available outlets are easy to find.
- Transmitter & Receiver Combination: Plug the transmitter into the outlet, and scan the breaker panel with the receiver.
- Visual & Audible Indicator: a beeping sound and flicker are offered when the correct breaker is found.
- ETL Listed: Industry leader in safety and performance.
- Auto Power-Off: Preserves battery life when not in use.
- Portable & Sturdy: Lightweight, easy to take to the job site.
So, what are you waiting for? Grab your circuit breaker finder now!