Did you know that the ideal temperature for a pizza stone ranges from 650°F to 900°F (343°C ~ 482°C), depending on the pizza type you want to make? Infrared thermometer kitchen use has made temperature precision for home cooks a reality. These handy devices can measure temperatures from -58°F ~ 1112°F (-50°C to 600°C) with a response time of less than half a second. Infrared thermometer for cooking have been used in manufacturing and construction for decades but have recently become popular in commercial and household kitchens.
These thermometers are easy to use and don’t require contact with the food item or cooking surface. This makes them very convenient to use when your cooking temperature is not the same as the oven temperature i.e. when you are using a pizza stone or a griddle. This article will look at how you can use an infrared thermometer in your kitchen, mistakes to avoid and cooking scenarios where it really comes in handy.
What is an Infrared Thermometer?
An infrared thermometer is a handheld device that measures the surface temperature of an object without direct contact. These tools detect the thermal radiation naturally emitted by objects. The device uses a lens to collect this infrared energy and directs it onto a sensor called a thermopile, which measures the temperature.
The thermopile converts the thermal energy into an electrical signal which the device translates into a temperature reading. Once it scans the object, the thermometer will display the temperature reading on the screen.
How Do Infrared Thermometers Work?
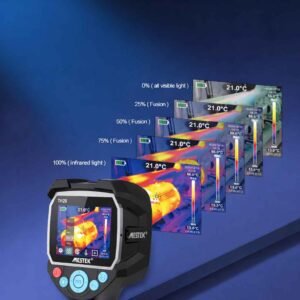
All objects made up of atoms are in motion. The speed at which these particles move is directly related to the object’s temperature—the higher the temperature the faster the molecules vibrate. As they move these molecules emit energy in the form of infrared radiation.
Infrared radiation has a longer wavelength than visible light so we can’t see it. But if an object gets hot enough its radiation can shift into the visible spectrum and it will glow red or even white hot like heated metal. We can’t see infrared light but we can feel it as heat—this is the warmth from the sun, a heater or a fire.
Infrared thermometers detect this invisible heat energy. They detect the infrared heat given off by objects like food, ovens, or other surfaces. The device then translates this measurement into a temperature reading which is displayed in Fahrenheit or Celsius.
Common Mistakes and How to Avoid Them
Using an infrared thermometer in the kitchen can sometimes lead to incorrect temperature readings. Here are some mistakes and how to fix them:
1) Hard to Measure Reflective Surfaces
Shiny or polished surfaces such as stainless steel pots are a problem. Stainless steel has a low emissivity and also reflects the surrounding infrared energy instead of emitting its own. So if you point an infrared thermometer at a shiny pot of boiling water you might see 100°F instead of 212°F. You can solve this problem by rubbing on masking tape, painting with a flat black paint, or even putting on a thin film of cooking oil which will create a non-reflecting spot with a higher emissivity.
2) Not Stirring Oil Before Measuring
When checking liquids or oils, not stirring creates temperature gradients with some areas hotter than others. Without stirring the thermometer will read only the cooler surface temperature. Before measuring, stir vigorously to ensure uniform temperature distribution. Otherwise you’ll get readings that don’t represent the true temperature of the entire liquid.
3) Measuring Through Glass or Steam
Infrared thermometers can’t “see through” transparent surfaces. When aimed at a pot through glass the reading will reflect the glass temperature not the contents inside. Steam, smoke, or fog between the infrared thermometer and the food can block the heat it measures. This means you’ll get a reading of the steam, smoke, or fog instead of the actual surface temperature. Let steam clear before measuring.
4) Holding It Too Far Away
Every infrared thermometer has a specific distance-to-spot ratio. For example, a 12:1 ratio would read 12 inches for a 1-inch diameter circle. Moving beyond the recommended distance adds surrounding temperatures to your reading. Typically, within 3-4 feet ensures accuracy.
5) Ignoring Low Battery Warnings
A low battery can affect reading accuracy and cause malfunctions. Replace or recharge batteries as soon as indicators appear. Specifically fresh batteries will prevent issues with thermal shock when moving between environments with different temperatures.
Recommended Infrared Thermometers for Cooking
Several infrared thermometers excel for kitchen use, balancing accuracy, durability and price. Check out the top performers to find the right one for you.
1) MESTEK IR03B
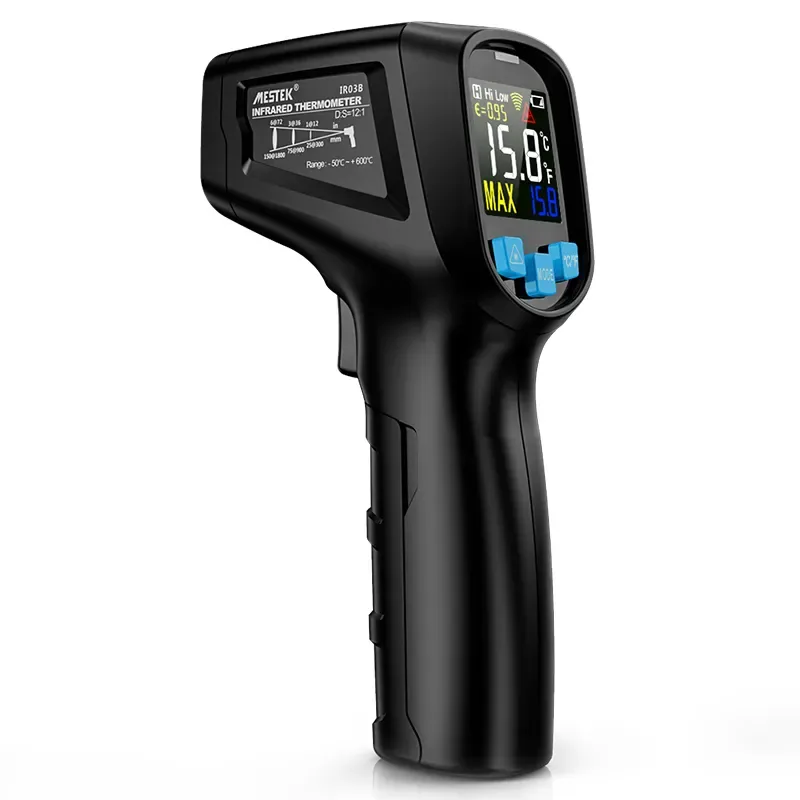
MESTEK IR03B infrared thermometer measures -58°F to 1112°F (-50°C to 600°C), ideal for kitchen, BBQ, and light industrial use. Its color LCD screen with a MODE button lets you adjust emissivity and switch °C/°F for accurate readings.Compact and ergonomic, a budget friendly tool for serious cooks who need fast surface temperature checks.
Pros:
- Affordable
- Adjustable emissivity
- Fast response time
Cons:
- Moderate D:S ratio (12:1)
- Lightweight plastic construction keeps it portable but may lack the premium feel of metal-bodied devices.
2) Fluke 62 MAX Plus
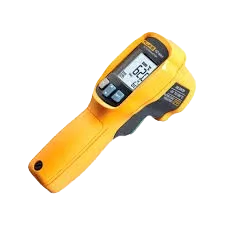
Fluke 62 MAX Plus is a professional infrared thermometer that’s accurate and tough. It measures temperatures from -30°C to 650°C with about ±1% accuracy and has a 12:1 distance-to-spot ratio. Two rotating lasers help you aim exactly where you want. It’s dust and water resistant (IP54), so it’s great for hot kitchens or outdoor use. It’s small, easy to hold, and has a big backlit screen for easy reading. Perfect for chefs who want reliable, professional tools.
Pros:
- Extremely rugged and water-resistant
- Dual lasers to identify measurement area
- Highly accurate
Cons:
- More expensive
- Heavier than compact models
3) Etekcity Lasergrip 800
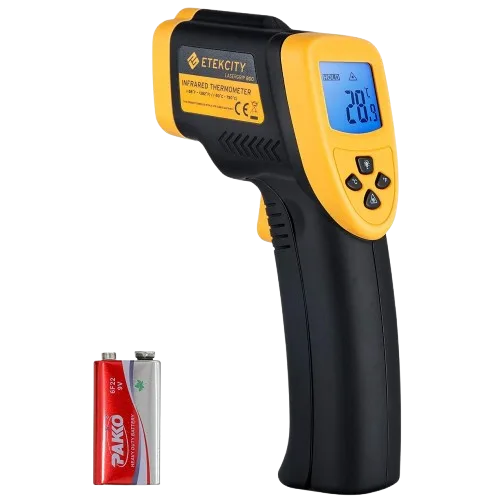
The Etekcity Lasergrip 800 is a popular choice for home cooks who want performance without the price. It has a wide temperature range of -50°C to 750°C and a 16:1 distance-to-spot ratio for safer measurements from farther away. Built-in laser pointer for easy aiming and adjustable emissivity for different materials. Backlit LCD display for dim kitchens and auto-off to save battery. Lightweight and user friendly for checking cast iron pan heat to grill temperatures.
Pros:
- Very high temperature range
- Good value
- Long D:S ratio for safer distance measurement
Cons:
- Lacks advanced features like adjustable emissivity.
- Accuracy is sufficient for home kitchens but not ideal for professional use.
4) ThermoWorks IR-Gun
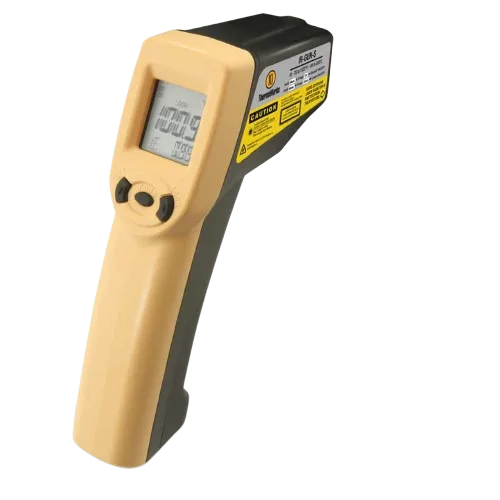
ThermoWorks IR-Gun is fast and reliable. It measures temperatures from -60°C to 550°C. The 12:1 optics ratio means that from 12 inches away, it measures a 1-inch spot. A laser pointer helps you aim, and you can adjust it for different surfaces. The big, backlit screen shows min, max, and hold readings. It’s sturdy and comfortable to hold. Perfect for cooks who want steady performance in everyday tasks like checking baking stones or making caramel.
Pros:
- Trusted brand among professional cooks
- Adjustable emissivity for diverse surfaces
- Solid build
Cons:
- More expensive than generic models
- D:S ratio is average, need to hold closer to smaller targets
How to Use an Infrared Thermometer on Food
Infrared thermometers are powerful tools for quickly checking surface temperatures in cooking. However, they require proper technique for accurate results. Here is how to use it effectively.
1) Point-and-shoot basics
Simply aim the infrared thermometer at the object you want to measure. Hold it straight and don’t tilt. Pull the trigger and the temp will show up on the screen. Make sure the lens is clean because any dirt or scratches will affect your readings.
2) Measuring cookware vs food surfaces
Cookware temperatures are different from food temperatures. To check cookware readiness, point the thermometer at the cooking surface before adding food. For liquids like soups or stews, stir thoroughly before taking measurements to distribute heat evenly. Afterward, either point directly at the liquid surface or ladle a small portion and measure that instead. Infrared thermometers measure surface temperatures only, not internal food temperatures—use a probe thermometer to check food doneness.
3) Using oil for better accuracy
Adding a thin layer of oil on cookware improves measurement accuracy. Oil emits infrared radiation at a known rate, creating a consistent reading surface. This is especially useful when checking skillet temperatures before searing meat. Begin by adding cooking oil to your pan, then aim your infrared thermometer at the surface of the oil once it’s heated. The oil increases the emissivity of the surface, making the reading more reliable than measuring bare metal.
4) Avoid Shiny Surfaces
Shiny surfaces like dry stainless steel pans reflect heat from around the kitchen instead of showing their actual temp. This can give you wrong readings. To fix this, you can put a small drop of cooking oil, place a piece of masking tape or paint a spot with flat black paint on the cookware. These simple fixes will allow the thermometer to detect the true surface temp.
5) Understand Distance-to-Spot Ratio
Every infrared thermometer has a distance-to-spot ratio that shows how big an area it measures depending on how far away you hold it. For example if your thermometer has a 12:1 ratio, it will measure a 1-inch wide circle when you are 12 inches away. If you stand too far back it will include temps from surrounding areas you don’t want. Always stay close enough to focus on the exact spot you want to measure for best accuracy.
Best Kitchen Uses
Here’s how infrared thermometers shine in real-life kitchen scenarios:
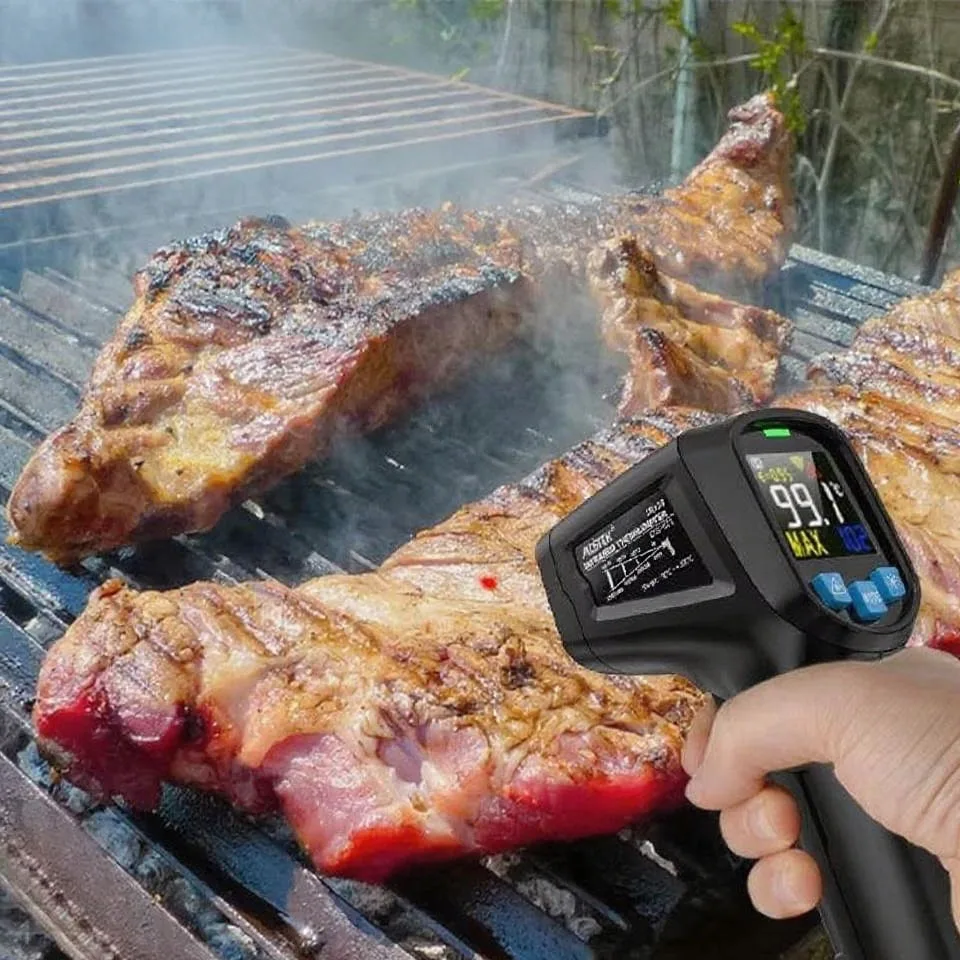
- Searing Steaks: Heat your pan to 425°F and check with a quick infrared to avoid undercooking or burning.
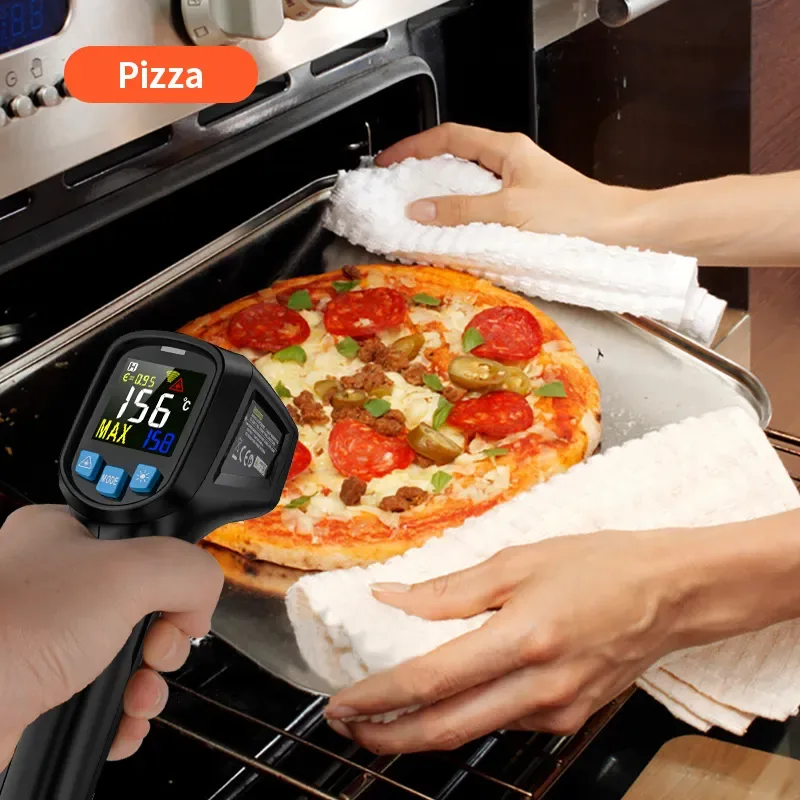
- Pizza Stones: Check stone temperatures between 650°F and 900°F for perfect pizza bases. This method is far more accurate than depending on the oven’s air temperature.
- Pancakes on the Griddle: 350°F–375°F constant for fluffy pancakes that aren’t burned.
- Candy and Chocolate Work: Know sugar syrups or tempered chocolate without touch, eliminate the risk of contact contamination.
- Dough Proofing and Yogurt: Both require a 75°F environment, a dough range or 100 – 110°F for yogurt to successfully ferment.
People Also Ask:
Can you use an infrared thermometer for meat?
Yes, infrared thermometers are excellent for checking the surface temperature of meat, grills, and pans. But they cannot measure internal temperatures, so for doneness, you still need a probe thermometer.
What is the best infrared thermometer for pizza ovens?
The best infrared thermometer for pizza ovens has a high temperature range (at least 900°F), adjustable emissivity, and a fast response time. For example, the MESTEK IR03B is ideal for home and commercial pizza ovens thanks to its wide range and precision.
Do professional chefs use infrared thermometers?
Yes. Many chefs use infrared thermometers to monitor surface temperatures of pizza stones, griddles, and pans. Compact models are particularly popular for fast, accurate checks during service.
Conclusion
Infrared thermometers make it easy to check temperatures in your kitchen. Instead of guessing, you get fast and accurate readings. Whether you’re baking bread, grilling meat or keeping food safe, these tools help you cook better. They can’t measure inside the food, but they’re great for surface temperatures. They work fast, are safe to use and can be used for many cooking tasks. They’re a chef’s best friend.
Try an infrared thermometer with your favorite recipes. You’ll have perfect heat control every time you cook. They’re fast, safe, and incredibly versatile, a true chef’s companion. Don’t wait—get professional accuracy in your kitchen today!
Shop now at the MESTEK infrared thermometer IR03B.